Edit your first video
Clips from your own phone in. A vertical video with subtitles out, edited and ready to post. Claude does the editing on your Mac, so your time goes into the story. I told Claude to build this in a way a five-year-old can follow and build it on their own. It's free, it's an early version, and I keep improving it from what people tell me. Come back for the next one.
Skip the bullshit, go straight to the prompts →
Full disclosure, I have no marketing experience whatsoever. I'm not an AI guru. I'm learning by doing. For two years I told the same story and barely reached anybody. Then I started using what I learned about storytelling, and I built tools to help me structure my story around what I want to say, in a way that fits the life I live. They keep me in check and keep the momentum going. They take the friction out of making videos, and I'm learning to work with the algorithm instead of against it. This is the exact system I use to make my videos now. The account almost doubled in two weeks. I think that says something, right? Nothing I did in the two years before that worked.
I wasn't even going to share this yet, because I don't think I have it perfect yet. But then a lot of friends started asking how it works and how I grew, and that's exactly why it's better to share it now, so everyone can make it better for themselves and we all learn together. I don't want to build the tools for you. Everyone has their own way of working, so a tool I build for you won't be the best fit. The better way is to show you how to build yours, so you can change it yourself. Your own engine, not another subscription to a video app. You work directly with your AI agents, and they always know what's going on in your life. It's a much more seamless flow, in my opinion.
Do you need to be technical to build your own tools? No. Here's why I can say that.
I have a degree in computer science and a master's in design science. I studied programming, 3D animation and visual effects, and filmmaking: directing, shooting, and editing in Final Cut Pro. For the past six months I've been learning AI, and I haven't needed any of what I learned at uni. None. I haven't touched a single piece of code in twenty years.
So you don't need any of it either. If an AI course is telling you to learn Python, get a refund and pay for a Claude subscription instead. Trust me, it'll save you money in the long run, and you'll thank me later. Claude is the best teacher for learning AI. Except maybe a guy with an Aussie Chinese accent 😉 Otherwise, learn straight from AI. I promise you'll learn so much quicker than on any course.
You're not behind. You're only behind if you don't start now. So start building the tools you need. Pick a problem you face every day, talk to Claude about it, and ask it to help you find a solution.
This one is for people who want to cut down the editing time so they can focus on creating, and use AI to make the creative side a little bit easier.
It won't create your story. Don't ask AI to script your story. If you ask AI to create a story that is not from you, it will be shit. It has to come through your experience, the story you genuinely want to tell. That part only works by not listening to AI, and listening to your gut feeling.
- A Mac on macOS 13 or newer, with about 6 GB free. The tools and the speech model add up to about 6 GB of downloads. That's normal.
- A paid Claude plan. Claude Code comes with Pro and Max, not with the free plan. Pro works. Max is better if you want to make a lot of videos: Pro has a usage limit that resets every few hours. If you hit it halfway, Claude tells you when it resets. Come back then and type "carry on" in the same chat.
- To be an admin on your Mac. The account you set the Mac up with usually is. To check: Apple menu, System Settings, Users & Groups. It says Admin under your name. You need it once, for one install.
- About an hour for the first setup, sometimes more. Most of it is waiting for downloads. After that, roughly 30 to 60 minutes per video, most of it Claude working while you wait.
- One clip of you talking to camera, or shots with a voice recording. Under 3 minutes for a first try.
- If something breaks: tell Claude what happened, in the same chat. It can usually fix it. Still stuck? DM @breakingcycles.life on Instagram with a screenshot.
Claude asks before each one. If you already have Homebrew tools, it checks first and tells you if anything would get upgraded.
Installs the other tools. If you don't have it, Claude shows you one line to paste into Terminal, because it needs your Mac password.
Cuts the video, fixes the sound and colour, and burns in your subtitles. It has to be the full version: the plain one can't do subtitles.
Turns your voice into text with times, on your own Mac. Nothing gets uploaded.
The speech model whisper-cpp uses. About 550 MB on an Apple chip Mac, a smaller one on Intel.
Runs Remotion. Claude installs it with the others.
Makes your subtitles, the big title in the first second, your poster, and animations like a route map, all in your brand style. It downloads its own render browser the first time.
Remotion is free for individuals, non-profits and companies with up to 3 employees. Bigger companies need a paid licence from Remotion (remotion.pro/license). If Remotion ever fails, ffmpeg burns in plain subtitles instead, so you still get a video.
Claude makes a folder called ContentEngine in your Home folder, with three folders inside: raw, work and exports. To find them (or just ask Claude to open it for you):
- Open Finder.
- Click Go in the menu bar at the top.
- Click Home.
- Open ContentEngine.
Then, every video:
- Your story: before you record, you talk to Claude and tell it your story, what the video is about and what you're trying to make.
- Your footage: you record it and drop it in raw. Claude never changes or deletes anything in raw, so your originals stay safe.
- Claude works in work: what you said written out word for word, the storyboard, the edits, your brand and the rules all go there. You never need to open it.
- Storyboard: you check it.
- Pick who finishes it, Claude or you.
- Finished video: it lands in exports with 2 captions to pick from, ready to post.
Working out the story itself, the script, the research, your angle, is its own job. That's Module 01. This page is the filming and the editing.
Shot it on your iPhone?
- AirDrop the clips to your Mac (or in Photos: File > Export > Export Unmodified Original).
- Drag them into the raw folder in Finder.
 Claude cuts it
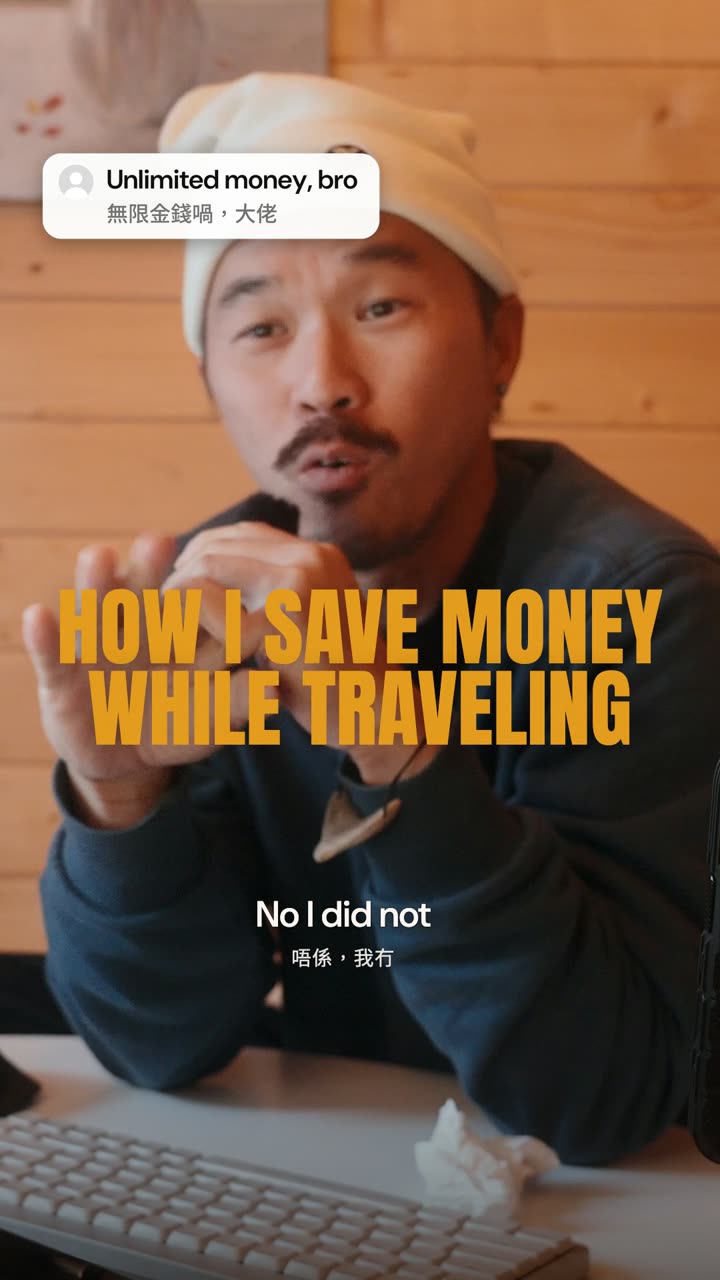
- Video file. Ready to post.
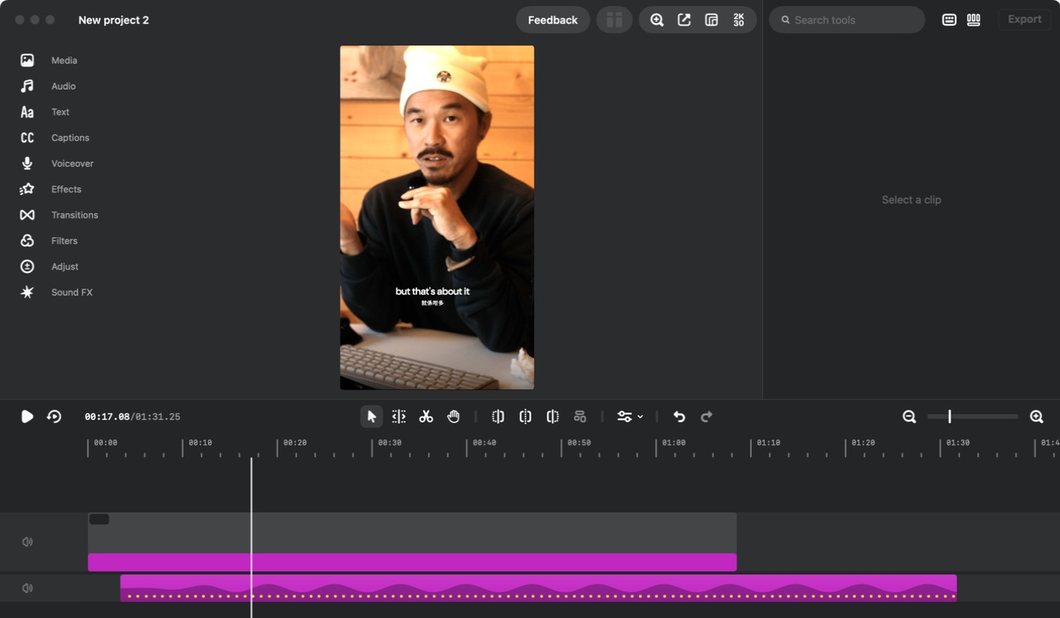
 Instagram Edits. Claude adds a song. Nothing posts until you say yes.
 You finish it
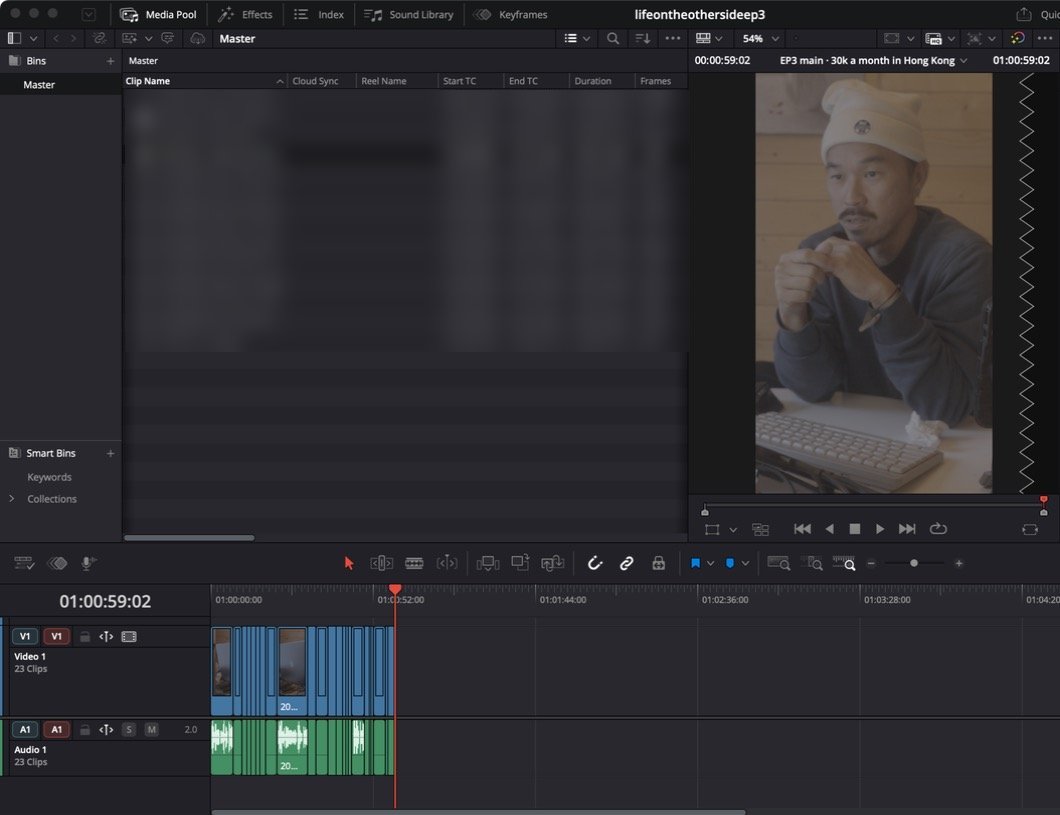
- A timeline for DaVinci Resolve.
A page opens in your browser with one picture per shot and the words you say in it, in order.
- Check the order, and that nothing you care about got left out.
- Type "ok" in the chat, or say what to change in plain words, like "keep the bit about my dad".
Nothing gets edited until you say ok.
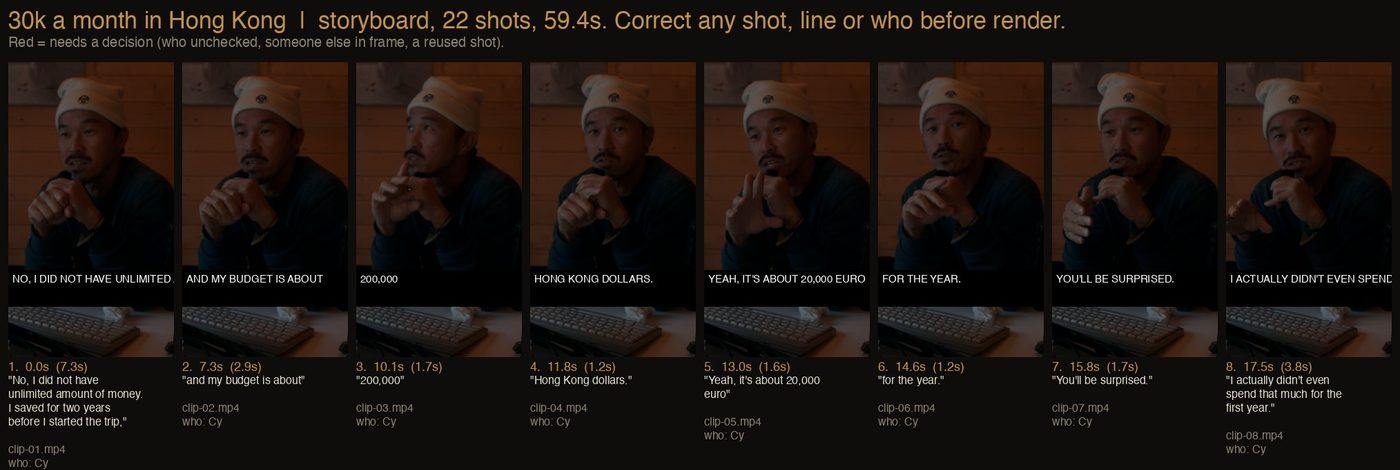
Claude asks which way before it cuts, every time.
It lands in your exports folder with 2 captions to pick from, ready to post yourself.
Not sure? Pick this one.
Claude opens the finished video in Instagram Edits (free) and adds a song.
- You pick the song from Instagram Edits' licensed music. Claude keeps it low under your voice.
- Claude types your caption, sets trial reel, location and tags if you want, then asks "post it?" It presses Share only when you say yes.
- It posts straight away, there's no scheduling. It's public unless you pick trial reel. The upload can take about 20 minutes.
Apple silicon Macs only (M1 or newer). If Instagram Edits doesn't connect, you get the video file to drag in yourself.
Set up once, Claude walks you through it
- Get Instagram Edits for Mac at edits.com/desktop and sign in with Instagram.
- In Instagram Edits, go to Settings > Automation and turn on Enable Automation Server.
- Copy the line that starts with
claude mcp addand paste it into the Terminal app yourself, never into the chat. It holds your private key. - Start a new session in the Code tab of the Claude desktop app.
- Optional. Turn on computer use in the Claude desktop app so Claude can post for you. Without it, you post it yourself.
Claude cuts it into a timeline, your clips laid out in order, and you finish it in your editor. Tested in DaVinci Resolve (free). How I've made my last few reels.
- No render to wait for, fewer tokens used.
- You cut the repeats Claude missed yourself.
- Best if you already know a video editor.
Set up in DaVinci Resolve, every video
Claude tells you the frame rate.
- Get DaVinci Resolve (free, click Free Download Now).
- Make a fresh project for each video.
- File > Project Settings > Master Settings. Set Timeline and Playback frame rate to Claude's number, then Save.
- File > Import > Timeline, and pick Claude's file.
If the two don't match, the sound crackles.
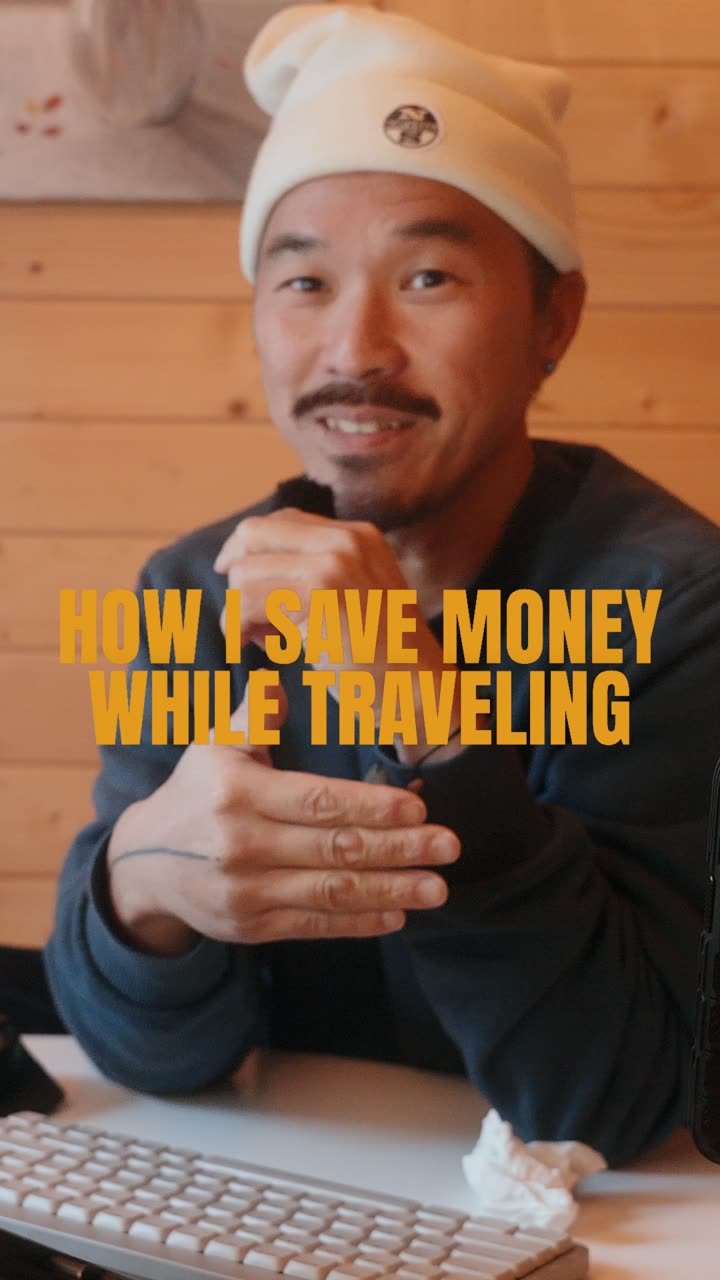
It lands in exports: a vertical video with subtitles, ready to post. Here's the one I posted on 5 Nov, made with the full version of this workflow.
The prompt only works in Claude Code. It won't work in the normal Claude chat, because the chat can't make folders or edit files on your Mac. Claude Code lives inside the Claude app, in the Code tab.
- Go to claude.com/download.
- Click Download for macOS, and open it.
- Drag it into Applications if it asks.
- Open Claude and sign in with your Claude account.
It sits next to Chat. If it asks you to upgrade, you're on the free plan: Claude Code needs Pro or Max.
- Under the message box, make sure it says Local.
- Click the folder button and pick your Home folder (the one with a house icon and your name).
- Click Copy the prompt below.
- Paste it in the message box and press Return.
Claude asks before it runs anything on your Mac, writes a file or installs anything. From the moment it makes your folders, expect about 20 to 30 of these in the first setup: one per file it writes, one per install. That's normal. It's not stuck in a loop.
- Read the one line, then allow it.
- If you're not sure, ask it "what does that do?" first.
- Fewer prompts: in the row under the message box, set the mode to Accept edits. It stops asking about each file and still asks before it runs anything else.
About 10 minutes in, Claude needs to install two free tools, through an installer called Homebrew. That installer needs your Mac password, and Claude isn't allowed to type it. So it asks you to:
- Open the Terminal app (press Cmd and Space, type Terminal, press Return).
- Paste the one line it gives you.
- When Terminal asks for your password, type your Mac login password and press Return. Nothing shows while you type, not even dots. That's normal.
- Press Return again if it asks.
- Wait 10 to 30 minutes while it downloads.
- When it's finished, go back to Claude and type "done".
If Terminal says your account is not an administrator, stop and tell Claude: you need to log in to the Mac as its admin, or ask whoever set the Mac up. Already have Homebrew? Claude skips this.
Most of the time you just allow the next step. Some steps need you. Here's your whole part, in order.
- 1 and 2 happen once.
- 3 to 9 happen every video.
- Two extras, first video only: 5 questions about your brand (or take the default look and answer them after your first video), and 5 questions about how you write, so your captions sound like you.
You: (paste the prompt, press Return)
Claude: I'll check your Mac first. It only looks, it doesn't change anything. OK?
You: yes
Claude: Your Mac is fine. macOS 15, 120 GB free.
Claude: Can I make a folder called ContentEngine in your Home folder?
You: yes
You
- 1. Paste the prompt, allow each step
- 2. The Terminal moment: paste one line, type your Mac password
- 3. Your story: talk to Claude, tell it what the video is about and what you're trying to make
- 4. Your footage: record it, get it on your Mac, drag it into raw
- 5. Storyboard: check it, type "ok" or what to change
- 6. Fix any misheard words in the subtitles
- 7. Pick who finishes it, a video file, Instagram Edits or the timeline
- 8. Watch it, say what to change (not for the timeline)
- 9. Finished video: pick one of 2 captions, post it from exports, or say yes and Claude posts it from Instagram Edits
Claude
- Checks your Mac, makes the folders
- Installs the free tools
- Works in work: writes out what you said, plans the edit
- Builds the storyboard
- Cuts it, or builds the timeline
- Checks its own cut before you see it (not for the timeline)
- Puts the finished video and 2 captions in exports
Copy it, then paste it into the Code tab (see Start here). It asks before it installs anything or writes a file.
The prompt didn't load here.
- Download it as a file.
- Right-click the file in Downloads, Open With, TextEdit.
- Select everything under the line that says "Copy everything below this line into Claude Code".
- Copy it (Cmd and C).
- Paste it into the Code tab.
Read it first
Loading…
"All you have to do is drop your videos in, drop your ideas in. And shape Claude to your voice."
Every editing rule is written in plain English, in a file Claude reads before each edit. Like how long a pause it keeps between sentences. Want shorter pauses, or fewer cuts? Just tell Claude in the chat. It changes the rule for you, and you see the difference on the next video.
It keeps notes on your style. After each edit it asks what you would change and writes it down. When the same change comes up 3 times, it offers to make it a rule.
Got your own fonts, or a colour look file from your editing app? Drop them in. No brand kit? It asks you 5 questions (your handle, your colours, the font feel you like, where the subtitles sit, natural colour or a set look), then shows you 2 or 3 subtitle styles on your own clip to pick from.

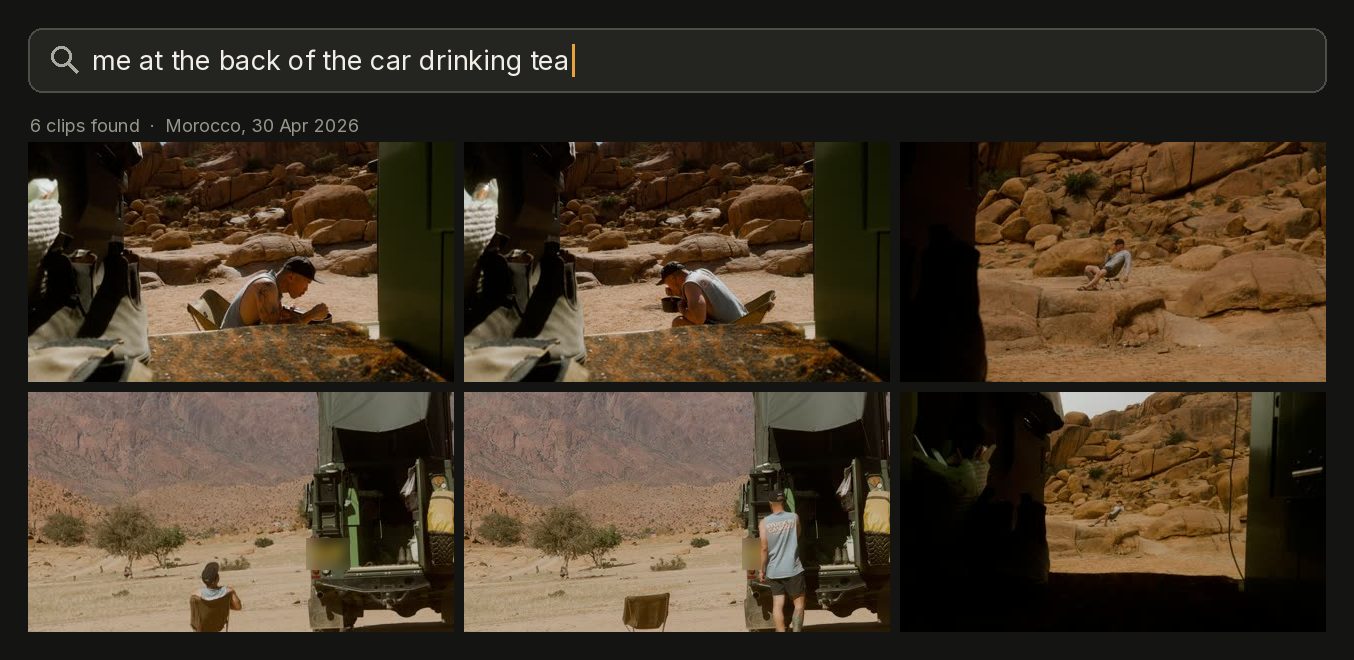
Not in the starter kit yet, but it's one of the most powerful things I use. Claude can find any clip on your drive from a few plain words.
- Claude builds an index of your whole drive, once: for every clip, a few frames and a transcript of what you say.
- You ask in plain words: "me at the back of the car drinking tea", or "the bit where I talk about the border".
- Claude searches the index and shows you the clips.
It's not foolproof: it won't find every clip every time. It finds them much more easily if your footage is sorted into folders by place or by date, so Claude can narrow the search.
The first pass takes a while on a big drive. After that it only looks at new clips. To build it for your own drive, paste this into Claude Code:
Build an index of every video in my footage folder: for each clip, a few frames and a transcript of what I say, so I can ask you to find any clip in plain words.
Everyone who tries it is a tester, me included.
If something breaks:
- Tell Claude what happened, in the same chat, first. It can usually fix it.
- If it can't after 2 tries, it writes the problem down for you (in a file called style.md, inside work, then rules) and tells you.
- Then DM @breakingcycles.life on Instagram with a screenshot and what you were doing when it broke.
Finding the story is something I'm still working on, and I'm beta testing it on myself. By the look of it, it's working, because my account is growing. Want to learn more? Follow and stay tuned. I share all my lessons learnt as I go.
Scheduled posts. You post it yourself, or pick Instagram Edits and nothing posts until you say yes. Instagram Edits posts straight away.
Play with it, make it your own, then send me your feedback so we can make it better for everyone. Everybody wins.
I'm still testing this. When a rule turns out wrong, I'll change it here.
If you want the next version, follow along on Instagram, @breakingcycles.life.
New here? Module 01 · Tell your story → Start: get the app, paste the prompt ↑